How to Choose the Right Optical Equipment?

Choosing the right Optical Equipment is less about buying the most expensive model. It is about matching performance with your real working conditions.

A useful decision begins with the intended task. A birdwatcher may value brightness, field of view, and comfortable focus control. A laboratory user may need resolution, stable mounting, and accurate color reproduction. For photography, lens compatibility, focal length, and low-light performance can matter more than extreme magnification. Start with the subject.

Small details matter.

Before purchasing, inspect technical specifications carefully. Check glass quality, optical coatings, aperture, focusing range, and image stabilization. Compare these details with independent reviews, laboratory tests, and manufacturer documentation. A confident recommendation should be supported by evidence, not attractive advertising. If possible, test the equipment in conditions similar to your own. Hold the binoculars for several minutes. View fine text through a microscope. Notice edge sharpness and eye strain.

Practical experience also reveals weaknesses that specifications may hide. A heavy telescope can produce excellent images but become frustrating during transport. A compact camera lens may focus quickly yet perform poorly in dim rooms. Weather sealing, warranty coverage, repair access, and replacement parts deserve attention too. These factors influence reliability over years, not only on the first day.

There is no perfect choice.

Even experienced users can overvalue sharpness and overlook comfort, learning time, or maintenance. I have found that a balanced decision is usually safer than chasing one impressive feature. Define your budget, record your priorities, and leave room to reconsider them. The right equipment should support clear observation, consistent results, and confident use.
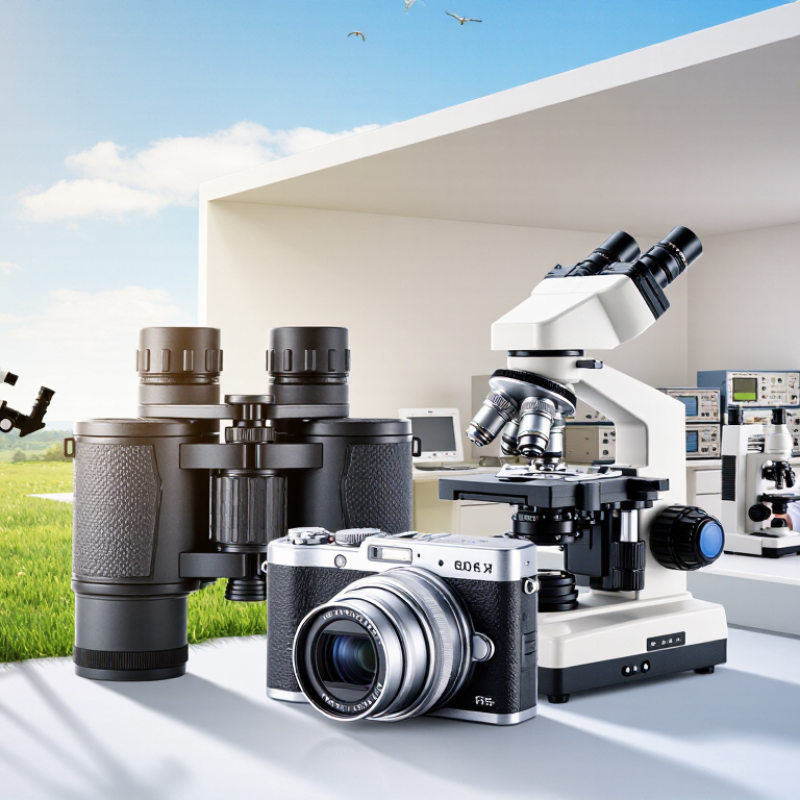
How to Choose the Right Optical Equipment?

Define the Optical Task and Required Viewing Conditions

How to Choose the Right Optical Equipment?

Choosing optical equipment starts with a precise question: what must you see, measure, or inspect? A wide scene needs a broad field of view. Tiny surface defects require higher magnification and stronger resolution. For moving subjects, excessive magnification can make tracking difficult. The task should guide the equipment, not the other way around.

Viewing conditions matter just as much. Measure the working distance between the equipment and the subject. Check whether the area is bright, dim, dusty, vibrating, or exposed to changing temperatures. Glare can hide fine details on glass, metal, or wet surfaces. Low contrast may require better illumination rather than more magnification. Consider viewing duration, too. An uncomfortable eyepiece can reduce accuracy after several minutes.

Real testing often reveals problems that specifications miss. I once selected a powerful optical system for close inspection, but its narrow viewing area slowed the work. The image looked excellent. The process did not. Eye relief, focus control, depth of field, and user posture deserve practical attention. Ask several users to inspect the same sample under normal conditions. Compare what they can identify, not only what the equipment promises. A simple trial with printed markings, textured materials, and low-light targets can expose weak contrast or awkward controls. Some choices remain uncertain until the equipment meets the actual task.

Compare Key Specifications Across Optical Equipment Types

Choosing optical equipment starts with the application, not the largest number on a specification sheet. Magnification matters for microscopes and telescopes, but it cannot replace resolution. A 40x microscope with poor numerical aperture may show less detail than a sharper 20x system. For binoculars, compare aperture, field of view, eye relief, and low-light performance. A wider field helps when tracking moving subjects.

Check numerical aperture, working distance, and illumination control for microscopy. Higher numerical aperture can improve resolution, but it may reduce working distance and make sample handling harder. Spectrometers require different comparisons. Examine spectral range, resolution, stray-light control, detector sensitivity, and wavelength accuracy. Ask how each value was measured. Published figures can use different test conditions.

For imaging systems, compare sensor size, pixel dimensions, dynamic range, shutter behavior, and lens compatibility. In practical testing, I inspect a fine grid, a dim target, and a high-contrast edge. This reveals blur, noise, and color errors quickly. Small details matter. I once chose higher resolution and overlooked vibration sensitivity. The result looked worse during real measurements. That mistake still influences my selection process. Specifications should be checked against calibration records, environmental limits, and expected maintenance. A stable, slightly slower instrument may produce more reliable data than a powerful system used beyond its useful range.

Match Lens, Magnification, and Field of View to Your Use

How to Choose the Right Optical Equipment?

Match Lens, Magnification, and Field of View to Your Use

Choosing optical equipment starts with the scene, not the specification sheet. A wide field of view helps when tracking moving subjects or scanning a large area. A narrow view can reveal more detail, but it makes subjects harder to locate. I once chose excessive magnification for distant observation. The image looked impressive, yet small movements became frustrating.

Lens size affects brightness, weight, and comfort. Larger lenses can collect more light, especially during early morning or indoor inspection. However, they may feel heavy after several minutes of handheld use. For casual observation, a moderate lens often provides a steadier experience. Check the focus control, eye relief, and balance before trusting impressive numbers.

Magnification needs a practical match. Low magnification suits broad landscapes, quick scanning, and moving subjects. Higher magnification works better for stable targets, detailed inspection, or tripod use. Keep your hands in mind. Even a clear image becomes tiring when every breath causes visible shaking. A wider field may also be more valuable than extra power.

Test it outdoors.

Look at fine branches, nearby textures, and distant edges. If details disappear in shadow, the lens may not suit your normal conditions. If the field feels cramped, reduce magnification. Specifications provide useful guidance, but real handling exposes weaknesses. I still reconsider my choices after extended use, because comfort and control are easy to underestimate.

How to Choose the Right Optical Equipment? — Match Lens, Magnification, and Field of View to Your Use
Equipment Type Typical Lens or Objective Useful Magnification Approximate Field of View Best Suited For Key Selection Consideration
Wide-Angle Binoculars Objective lens: 32–42 mm
Angular field: approximately 6–8°
6×–8× About 105–140 m at 1,000 m Hiking, wildlife observation, concerts, and general outdoor viewing Choose a wide field of view for moving subjects and easier tracking. Lower magnification generally provides a steadier image.
General-Purpose Binoculars Objective lens: 40–50 mm
Angular field: approximately 5–7°
8×–10× About 85–120 m at 1,000 m Travel, nature study, sports, and occasional astronomy Balance magnification, brightness, weight, and hand stability. An objective diameter around 42 mm is a practical all-purpose compromise.
High-Power Binoculars Objective lens: 50–80 mm
Angular field: approximately 3–5°
12×–20× About 50–90 m at 1,000 m Long-distance viewing, astronomy, and shoreline observation A tripod or image stabilization is strongly recommended because high magnification makes hand movement more noticeable.
Birding or Field Scope Objective lens: 60–85 mm
Eyepiece: fixed or variable-power
20×–60× Approximately 15–45 m at 1,000 m, depending on the eyepiece Bird identification, wildlife surveys, and distant landscape details Use lower power for locating a subject and higher power for identification. Larger objectives improve light gathering but increase size and weight.
Astronomical Telescope Objective lens or primary mirror: commonly 70–200 mm for portable systems 30×–200× Usually less than 2°; varies with focal length and eyepiece Moon, planets, bright deep-sky objects, and detailed sky observation Magnification is determined by telescope focal length divided by eyepiece focal length. Atmospheric conditions often limit useful power before the optics do.
Compound Microscope Objective lenses commonly: 4×, 10×, 40×, and 100× 40×–1,000× total Approximately 4.5 mm at 40× to 0.18 mm at 1,000×, depending on the optical system Cells, microorganisms, prepared slides, and laboratory samples Total magnification equals objective magnification multiplied by eyepiece magnification. Resolution and illumination are more important than magnification alone.
Stereo Microscope Zoom or paired objectives commonly covering 0.7×–4.5× 5×–45× total Approximately 45 mm at low power to 5 mm at high power Dissection, electronics inspection, insects, jewelry, and three-dimensional objects Choose a larger working distance for tools and specimen handling. Lower magnification provides a wider view and faster specimen positioning.
Macro Imaging Lens Focal length: commonly 50–105 mm
Magnification ratio: up to 1:1
1× optical reproduction At 1:1 reproduction, the captured area is approximately equal to the sensor or film size Product details, insects, plants, textures, and small technical components Working distance matters: longer focal lengths usually allow more space between the lens and subject, while shorter lenses can provide a wider view.
Inspection Camera Lens Fixed or interchangeable lens; commonly 2–25 mm focal length for compact cameras 0.5×–10× digital or optical Approximately 5–100 mm across, depending on sensor size, lens, and working distance Machine parts, pipes, assemblies, printed circuit boards, and quality control Prioritize the required working distance, lighting, depth of field, and minimum feature size before selecting higher magnification.
Telephoto Camera Lens Focal length: commonly 100–600 mm Subject-dependent Approximately 20° at 100 mm to 4° at 600 mm on a full-frame format Sports, birds, wildlife, and distant subjects Longer focal lengths narrow the field of view and enlarge distant subjects. Select stabilization and shutter speed according to the lens length.

Practical rule: Choose the widest field of view that still shows the required detail. Increase magnification only when the subject is too small to identify, and confirm that the lens provides sufficient light, working distance, and image stability.

Evaluate Build Quality, Compatibility, and Operating Comfort

Choosing optical equipment starts with how it is built, not how impressive it looks. In my field tests, a solid housing often reveals itself through small details. Focus rings should turn evenly, without grinding or sudden resistance. Hinges need controlled tension. Lens barrels should feel secure, but not excessively heavy. Examine seals, protective coatings, and the alignment of moving parts. These features affect service life in cold, damp, or dusty conditions. A light model may feel attractive. It may also sacrifice stability.

Compatibility deserves a written checklist. Confirm the mounting system, thread size, sensor or viewing format, and required adapters. A technically excellent instrument can become frustrating when an adapter shifts the optical axis. Check clearance around controls and confirm that accessories will not block ports. Review operating temperature ranges and power requirements when electronics are included. Do not trust a product page alone. Compare the specifications with equipment already on your bench. I have overlooked connector placement before. That mistake cost time.

Operating comfort determines whether accurate work remains possible after an hour. Test the grip with your usual gloves. Adjust the eyepiece, controls, and balance while standing or seated. Eye relief matters for users who wear glasses. Controls should be reachable without changing your stance. Watch for neck strain. A tripod collar, padded contact point, or adjustable strap can make a measurable difference. Still, comfort is personal. What feels balanced to me may feel awkward to another operator. Borrowing or testing before purchase is wiser than trusting photographs. Build quality, compatibility, and comfort must agree in real use.

Balance Performance, Maintenance Needs, and Total Cost

Choosing optical equipment is rarely about the lowest purchase price. The U.S. Department of Energy’s Operations and Maintenance Best Practices Guide estimates that maintenance can consume 60–70% of a facility’s lifetime cost. Optical systems deserve the same scrutiny. A cheaper instrument may require frequent alignment, specialist calibration, or costly replacement lamps. Ask for service intervals, calibration procedures, spare-part availability, and expected downtime before comparing quotations.

Performance must match the real task. A detector with impressive sensitivity may add complexity without improving your measurements. The International Organization for Standardization’s ISO 10110 framework highlights the importance of defined optical specifications, including surface quality and dimensional tolerances. In practice, record these requirements before testing equipment. Check results at the intended wavelength, temperature, and workload. Laboratory conditions can be misleading.

Maintenance details become visible after installation. Dust on a lens, unstable temperature, or a weak connector can quietly reduce accuracy. The U.S. Department of Energy’s Federal Energy Management Program recommends life-cycle costing that includes energy, maintenance, replacement, and disposal expenses. Build those figures into a five-year estimate. Also, leave a contingency allowance. Real installations are imperfect. A spreadsheet may miss training time, delayed parts, or one frustrating alignment afternoon. Sometimes the most expensive feature is the one nobody uses.